Deskphone - Mobility Package
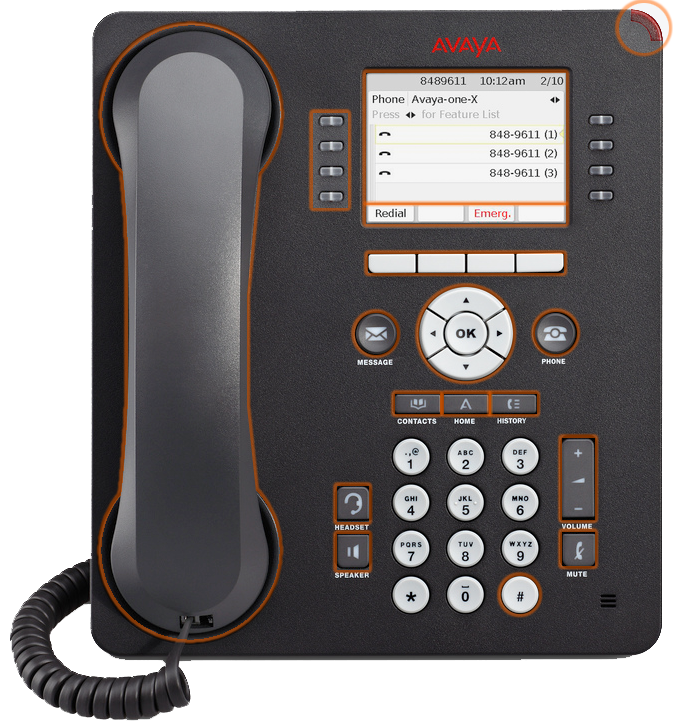
Hover over or tap on parts of the phone for an overview and see below for detailed instructions

911 Information
Do not move deskphones from the room in which they are connected as this can cause inaccurate information to be relayed to 911 emergency responders. To ensure accuracy when a phone needs to be installed or relocated, please contact your Communications Liaison so that they can conact Network Infrastructure and Services to place orders to install or move telephones.
The Avaya 9611G deskphone is the standard deskphone. It is not a touchscreen. The different features and components of the phone are:
- Voicemail indicator light, located at the top right of the phone. This light illuminates when you have an unread voicemail. The light will turn off once all voicemails are acknowledged. Voicemails are acknowledged either by your listening to them in the voicemail system or, if you have Unified Messaging, your email client marking the email containing the voicemail as 'read'.
- Handset, located at the left side of the phone. Used to make calls. Note you can dial the phone number before lifting the handset so that you can confirm it is correct. If you then lift the headset, it will dial the number you entered.
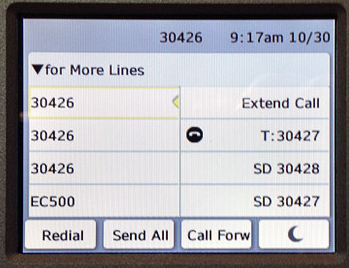
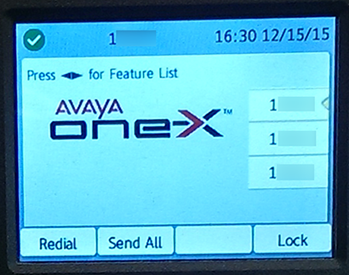
- Phone screen, located on the right side of the phone, just above center. The Avaya 9611G, which is the standard model, does not have a touch screen. Selecting on-screen items is accomplished using buttons bordering the screen. If you have an Avaya 9621g, 9641g, or 9650c, then you have a touch screen and can select items by tapping them.
- Feature buttons, the feature buttons border the phone screen on the left and right. allow you to select the adjacent on-screen features shown on the phone screen.
- Soft key labels, located at the bottom of the phone screen in a row. These labels can be activated/selected by pressing the corresponding soft keys below.
- Soft keys, located in a row below the phone screen. Soft keys, or software keys, allow you to select the corresponding items displayed along the botton of the screen. They are called software keys because the buttons will present different options depending on the context of what you're doing with your phone.
- Voicemail Button, a nickel-sized circular button adjacent to the handset towards the center of the phone. Press this button to access your voicemail. Upon first accessing your voicemail, you will have to set it up. From then on, you will use a password that you set up to access your voicemail. This voicemail password expires every year.
- Phone Button, a nickel-sized circular button at the right-center of your phone. The Phone button functions as your 'home' button in that it always displays the first call appearance page. This button is useful when you have navigated into deep levels of menus and need to start over or get reoriented.
- Navigation Wheel, a large circular button at the right side of the Phone between two nickel-sized circular buttons. The Navigation wheel is used to navigate menus and select items from menus. After pressing the Phone button, then pressing the up and down arrows will scroll through your three pages of call appearances.
- Contacts Button, the farthest left rectangular button below the navigation wheel. Create up to 250 contact entries to associate off-campus numbers with names. If you call someone frequently, you should consider setting up a speed dial for them.
- Home Button, the center rectangular button below the navigation wheel Used to set the options on your phone, such as the ring tone, call timer, whether phone history is logged, and more.
- History Button, the farthest left rectangular button below the navigation wheel allows you to see missed, answered, and dialed calls; these different call types can be sorted in your history by using the left and right arrows of the Navigation Wheel. The button will illuminate when you have a missed call, and when you view the missed call by pressing the History button, the illumination will turn off.
- Headset Button, located towards the bottom of your phone, it is the upper square button between the handset and the dial pad. Activate your headset as the calling device. A headset is not included with your phone. Headsets are useful when you need to talk with someone while simultaneously keeping your hands free to do other tasks, such as type on a computer. Many Jabra headsets will automatically activate and be ready for making a call as soon as they are undocked from their base.
- Speaker Button, located towards the bottom of your phone, it is the lower square button between the handset and the dial pad. This button makes the call audible when near your phone rather than using the handset. Also useful when you need to temporarily talk to someone and work hands free. If you do this often, you should use a headset.
- Volume Button, the tall rectangular button located towards the bottom and far right of your phone. When not on a call, this changes the volume of your ringtone. When on a call, this changes the volume of the other caller(s). Pressing the top of the button increases the ringtone/volume, while pressing the bottom of the button decreases the ringtone/volume.
- Mute Button, a square button located at the bottom right of the phone. When activated (illuminated red), the other caller cannot hear you. Note this is not the same as putting someone on hold because you can still hear the other caller.
- Dial Pad, three rows of circular buttons located towards the bottom of your phone, each about the size of a dime. Each is labeled with a number which is input by pressing the respective button in order to make outoging calls.
- Pound (#), the circular button located at the bottom right of the dial pad. Often used to confirm submission of information. For example, if you input your voicemail password and want to submit it immediately rather than wait for the system, then you can press the # button.
 button to view your main phone screen.
